If you’re dedicated to maintaining a functional home, one key area to focus on is your water heater. Something that’s usually taken for granted – until it suddenly stops working. Then, as anyone who’s been subject to that chilly surprise can tell you, you become acutely aware of the valuable job your water heater does.
Luckily, not all water heater problems require professional intervention. If you have a little bit of DIY spirit, you can find yourself replacing your water heater and restoring your home’s comfort in under 90 minutes.
**Why It’s Essential to Replace Your Water Heater**
The average lifespan of a water heater is 8-12 years. However, this can vary depending on the make and model, water quality in your area, and how well it has been maintained. If your water heater is on the older side, it could be losing efficiency, costing more to operate, and more likely to fail.
Aside from issues related to age, it’s crucial to replace your water heater if it:
– Leaks around the base of the heater
– Fails to deliver hot water
– Makes rattling or banging noises during operation
– Has a rusty inlet or pressure-relief valve
Any of these signs could mean it’s time for a replacement sooner rather than later.
**Replacing Your Water Heater in 90 Minutes or Less**
Installing a new water heater can be intimidating if you’ve never done it before. However, with the essentials at hand and a step-by-step guide, you could be back in hot water in less time than it takes to watch a movie. Here’s how.
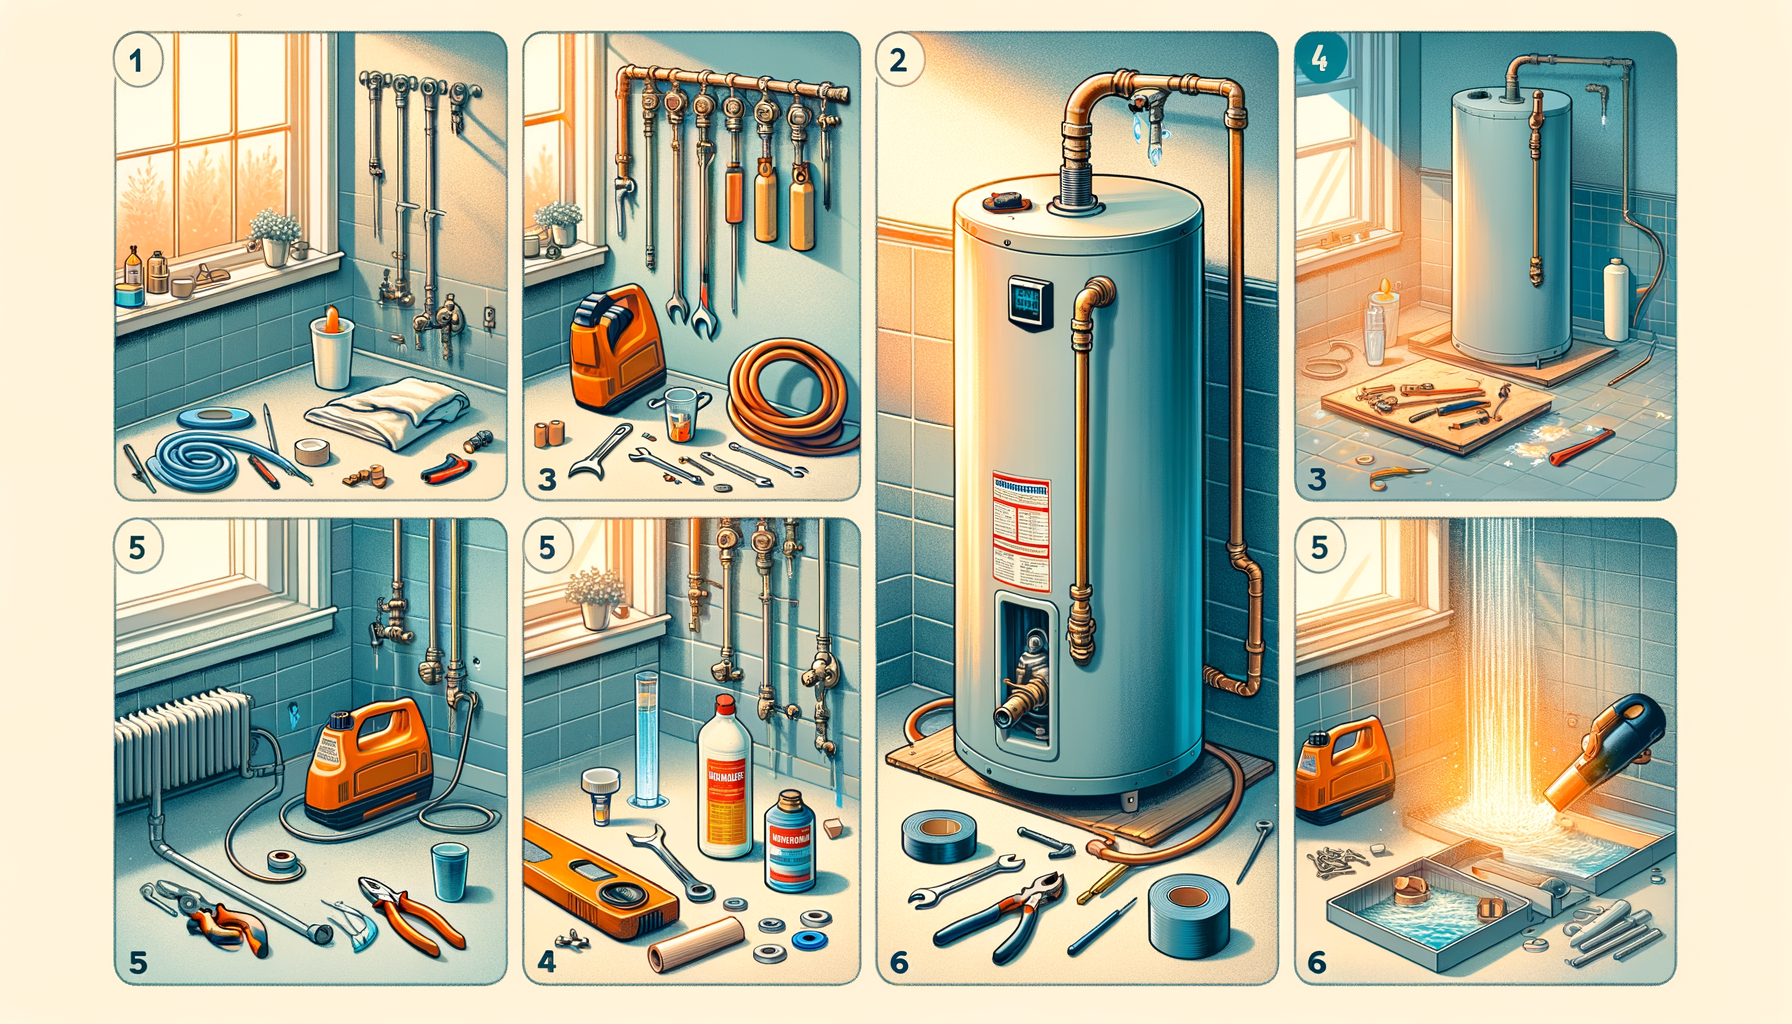
**Acquiring Your Tools**
The tools required for this job will likely already be in your tool box. The essentials include:
1. Pipe Wrench
2. Hose
3. Solder
4. Soldering torch
5. Shims
6. Teflon tape
**Selecting a New Water Heater**
When choosing a replacement, there are several factors to consider. First, decide between gas, electric, or a tankless water heater. Keep in mind your current setup; selecting a heater that matches your current power supply is a more straightforward process.
Next, consider the size. Do you often run out of hot water? You might need a larger tank. However, if you find you’re always heating water that you never use, downsizing could lead to energy savings.
Finally, consider the heater’s energy efficiency. While you may be tempted to go for the cheapest option, a more energy-efficient model can save you money in the long run.
**Getting Started**
Before starting, ensure all connected power and water sources are switched off. Be extra careful when dealing with gas connections to prevent accidents.
*Draining the Old Heater*
Begin by draining the old tank. Connect a hose to the valve at the bottom of the tank and lead it to an area where it won’t cause damage (like a drain or the outdoors). As hot water can be damaging or even dangerous, take care when choosing your discharge location.
Remember to open all hot water taps and the pressure relief valve on top to vent the heater while draining. Once the tank is empty, you can disconnect the heater.
*Disconnecting Water Connections*
Up next, we disconnect the water connections. If everything looks in great condition, appropriate repairs can save costs. However, if corrosion or other noticeable damage is present, replacing with new parts could avert future problems.
Unable to unscrew the connection? Don’t fret. With a pipe cutter, make a clean cut close to the joint. After installing the new heater, you can reattach it all using high-quality copper couplings and a bit of soldering.
*Disconnecting Gas Line (for gas models)*
When handling gas lines, take extra precaution. Slowly loosen the connection with your wrench, mindful of any resistance. Steady, careful movements will prevent leaks, avoid sparks and ensure the gas line isn’t damaged.
**Installing the New Heater**
*Step 1: Positioning Your Water Heater*
Have help on standby, as water heaters are bulky and might require assistance to move. Place your new heater in the correct spot and ensure it’s upright and level. You might need to adjust it a bit or use shims for stability.
*Step 2: Reconnecting Water Connections*
Apply Teflon tape to the threads before screwing in your connection. Connect the inlet and outlet pipes using the couplings and a pipe wrench. However, ensure you avoid over-tightening, which might cause damage. As each heater is different, refer to your user manual for the specifics.
*Step 3: Reconnecting Gas Line (for gas models)*
Ensure your Teflon tape is gas-rated. Apply it to the exposed thread before screwing the connection back into place. It would be beneficial to test for leaks once connected – a simple soap solution will do. If bubbles start forming, it means gas is escaping, and the connection needs tightening.
*Step 4: Filling the Tank*
For this step, begin by closing the drain valve and opening the water valve to start running water into an empty heater. A pro tip: leave the hot water taps open around your home as this can release trapped air. Once the water starts trickling out, close all the taps, and your tank is full.
*Step 5: Power On*
You’re all done; power that baby on! For electric heaters, reconnect the wires and turn the electricity on. If you’re working with gas, go ahead and relight the pilot.
Once the heater is operational, give it some time to work its magic. Then, step back and bask in your DIY triumph as hot water flows once again from your taps.
**Final Thoughts**
While replacing a water heater yourself might seem a daunting task, armed with the right information and a bit of confidence, it becomes less complex. As they say, learning is doing – your experience replacing your old heater can provide you invaluable skills that save you hundreds in maintenance and repair costs in the future.
Remember, safety first! Ensure your workspace is secure before beginning and be extra cautious when dealing with electric and gas connections. If you’re ever unsure or uncomfortable, don’t risk it. Call a professional who can ensure the job gets done safely and adequately. Happy DIY-ing!